Validate submitted data at your server and report errors back to users for correction and re-upload.
Server-side validation checks incoming data against your own business rules on your server, then relays any errors back to the importer. The check can be as simple as verifying that a user ID exists in your database, or something more complex that involves custom logic. Users then fix the errors and re-submit the data.
Users upload the spreadsheet, map columns, verify data, and then submit.
3
The importer pushes the data to your API endpoint
The importer sends the spreadsheet data via POST requests with JSON values to the API endpoint you configured. The request schema is available here.
4
Your app processes and validates the data
Your app validates the data against your business rules:
Validation succeeds (no errors found): your API returns a 200 HTTP response code, and the user sees the success screen.
Validation fails (one or more errors found): your API returns a 211 HTTP response code along with the validation errors in JSON format. See the error response format.
Your API must return the 211 HTTP response status code to tell the CSVbox importer that there are one or more server-side validation errors.To view the results screen, configure the CSVbox Results Page settings: go to Sheet Settings → Display → Results Page and set Closing the import dialog box to Do not close on import complete.
5
Users see the validation fail screen
If there are one or more server-side validation errors, users see the fail screen with a button to view the errors.
6
Users view the validation errors
Clicking the Errors button takes users to the Verify Data screen with all the server-side errors displayed.
7
Users fix the errors and re-submit the data
On re-submit, the process repeats: the importer pushes the data to your API endpoint via POST requests and looks for errors in the response.
Each re-submit is treated as a fresh import with a new Import_Id.
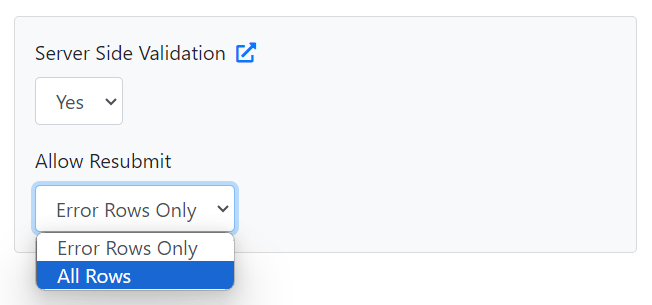
To let users re-submit all the rows (instead of only the error rows), select the All Rows option as shown below:
CSVbox server-side validation supports the following error types:
table: Shows high-level or common errors that apply to the entire upload. Renders as a dismissible alert above the grid.
row: Shows errors that apply to a whole row, not a specific cell. Renders as a red badge on the row number; clicking it opens a pop-up with the message.
column: Shows validation errors that apply to an entire column. Use these when the issue is with the column itself rather than with any individual row or cell.
cell: The previous behavior; highlights an individual cell with an inline message. This documentation refers to these as “cell errors.”
table: Missing required columns, inconsistent file format, duplicate file, or any condition that makes the whole dataset invalid.
row: Cross-field checks within the same row (for example, “End Date must be after Start Date”), referential issues that aren’t tied to a single column, or row-level business rules.
column: Issues that apply to a full column rather than to one cell or row (for example, an invalid column name, or a required column with an incorrect format or configuration).
cell: Format, length, or pattern errors, disallowed values, or any validation that is clearly attributable to one column.
When Server-Side Validation (SSV) is enabled, the data object received at the client (after submission) includes additional attributes that help you handle validation states programmatically.
Attribute
Description
ssv_enabled
Indicates whether Server-Side Validation is active for the current sheet.
ssv_fail
Set to true only when the server returns a 211 response code, meaning the import failed due to SSV errors.
ssv_row_fail
Number of rows that failed during server-side validation.
ssv_table_error
True if a table-level validation error was returned by the server.
Use these attributes to detect and respond to validation outcomes directly from your client application, for example by displaying custom messages, logging failed rows, or triggering retry logic.